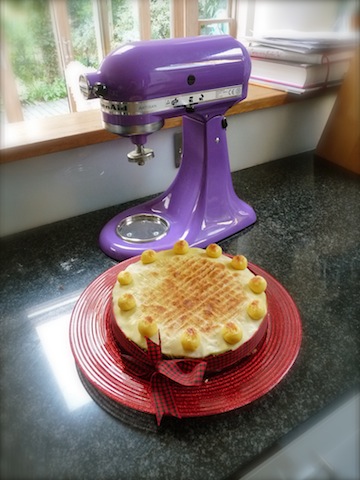
If you haven't seen one of these before, where have you been living? The iconic design of the KitchenAid stand mixer means it is coveted by cooks everywhere. And probably also non-cooking hedonists whose lives are dominated by a search for the aesthetically pleasing. You can't deny that its gorgeous curves, sleek surface and beautiful colours are probably more of an incentive to purchase it than any skill it might have in actual mixing; however, style and substance unite in its ability to effect a huge variety of kitchen tasks while still looking fabulous - it's the Nigella Lawson of kitchen equipment. I'm lucky enough to possess one of these mixers at the moment, so I'll be putting it through its paces to see how it fares in my busy culinary lifestyle.
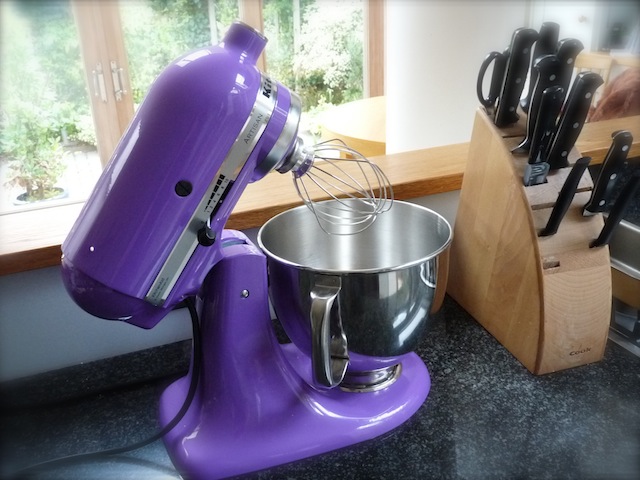
KitchenAid pride themselves on their stylish, durable and reliable mixer. It comes with three basic attachments: a wire whisk, a dough hook, and a beater. The former is for whipping fragile mixtures like egg whites; the dough hook for - obviously - bread doughs, and the beater for thicker, more sturdy mixtures like cake batters. However, should you wish to branch out, you can get all sorts of fancy attachments for it - a pasta maker, a sausage stuffer, a mincer, a citrus juicer, and an ice cream maker, to name but a few. It's pretty amazing what you can do with one piece of equipment. Especially when it's purple. My one is the 'grape' colour, but if you take a look at the website there are over 20 beautiful colours to choose from (my favourites are 'electric blue' and 'candy apple').

Now, it's all very well me saying this, but I can't really sing the praises of the mixer until I've tested it. Fortuitously, it's that time of year when I need to start thinking about making simnel cake, an Easter favourite in our house, replete with dried fruit, marzipan, and citrus flavours. I've made it for the last couple of years and decided to make it in good time this year to allow it to mature before Easter. I'm not very good at allowing baked goods to mature - I tend to eat them before they have half a chance - so it's probably a good thing I'm going to Italy on Saturday for a week; the poor simnel cake will be able to slumber, unmolested, in my kitchen, its sticky, sugary ingredients becoming acquainted and fusing together into a fruit-studded mass of Eastery goodness. Seeing as I declared the KitchenAid to be the Nigella Lawson of kitchen equipment, I decided to use a Nigella recipe to test it.
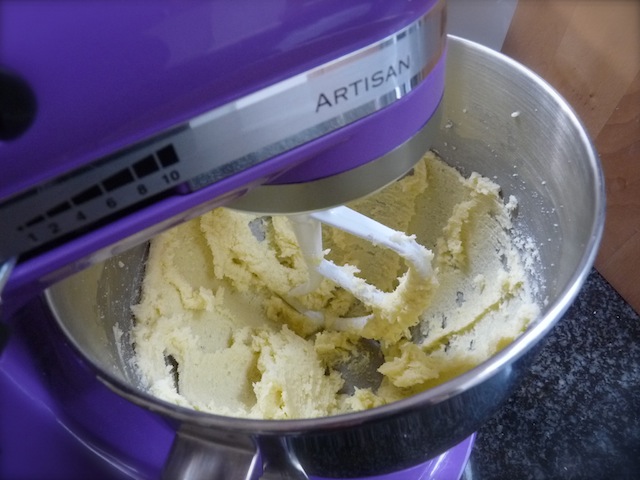
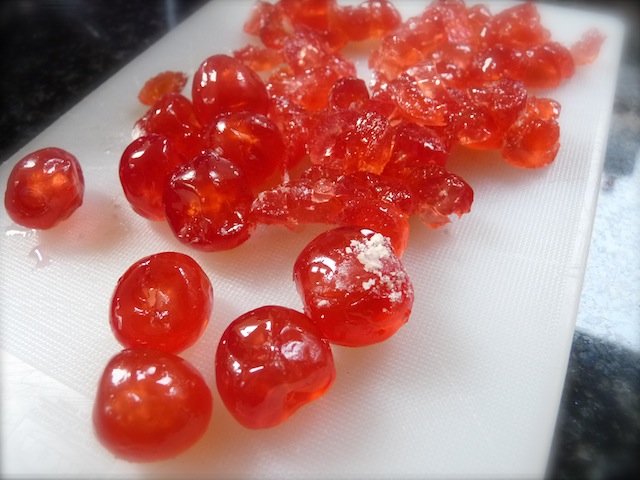
I used the beater attachment for this cake, because it's quite a thick mixture, especially once the fruit is added. Butter and sugar went into the mixing bowl, and within about a minute the mixer had beaten them to within an inch of their lives, forming a fluffy, creamy mass. I then incorporated the eggs, alternating with the dry ingredients (flour, baking powder, ground almonds, cinnamon, ginger). Finally, the fruit: glace cherries, sultanas, raisins, currants, mixed peel. One thing I would suggest is not to try cracking the eggs directly into the bowl while the mixer is on: you're guaranteed to drop half the shell in there too, which will be blitzed to a jagged paste before you can even utter a single word of profanity.
Ovoid disasters aside, I was very pleased with the mixer's performance. It's incredibly heavy, which also means it sits sturdily on the worktop and doesn't make huge amounts of noise as it mixes - far less noise than my electric whisk, which I'd normally use. One very minor criticism is that the lever you pull to change the speeds is rather stiff, and you can accidentally end up turning it off or right up when you only wanted to turn it down or up by a speed. But other than that, I have no complaints. I was worried that the beater might not be able to reach to the bottom of the mixing bowl (which, by the way, looks quite small but actually has a capacity large enough for most baking projects, at nearly five litres), leaving a residue of unmixed ingredients, but its unique planetary action (which sounds rather more exciting than it actually is, and had me eagerly expecting the mixer to launch into outer space and start orbiting Saturn) means that no part of the bowl is left unscraped.
The attachments are also very easy to attach and remove, as is the bowl, which makes for easy cleaning. It's definitely a piece of equipment that you'd want to sit on your worktop, rather than in a cupboard, largely because it's so heavy that you'd be built like a wrestler if you were trying to manoeuvre it every day. I think that's why they make so many lovely colours: you're guaranteed to find one that works with your kitchen decor.
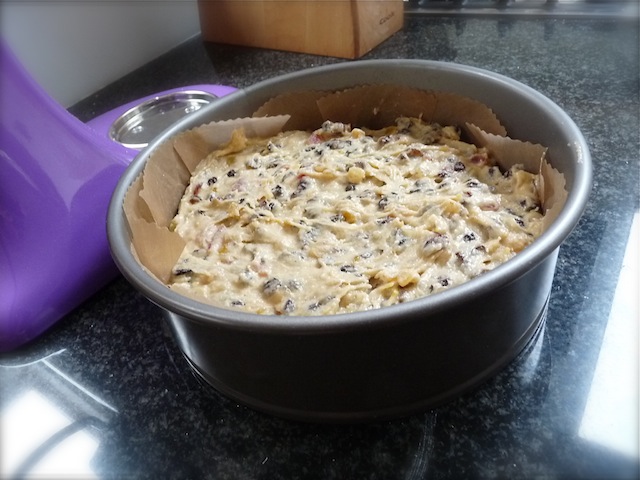
I put half the cake mixture in its tin, and rolled out a circle of marzipan to cover it, before spreading the rest of the mixture on top. It then went in the oven. This delightful vein of almond paste in the centre of the cake adds moisture and flavour without being overpowering; it's not like the huge chunk of marzipan you find in stollen. I'm not sure who had the idea of putting sugary almond mixture in the middle of a cake, but it's a good one.
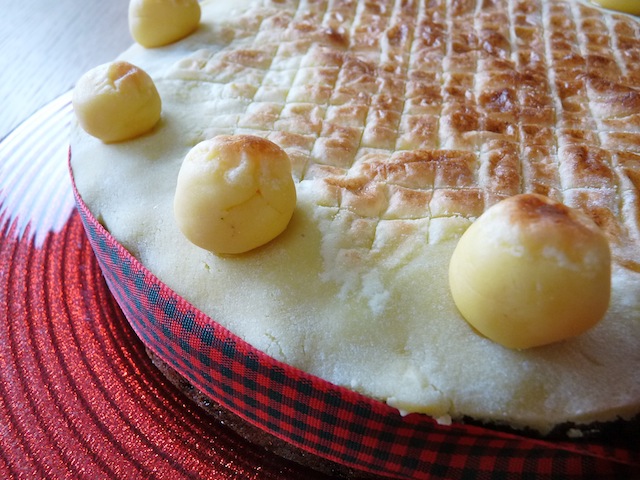
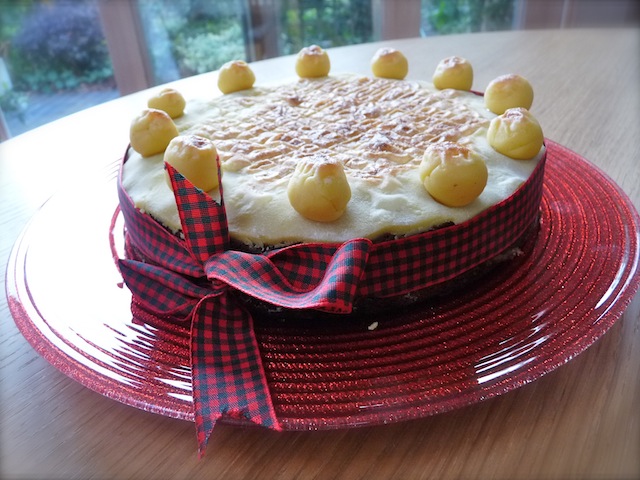
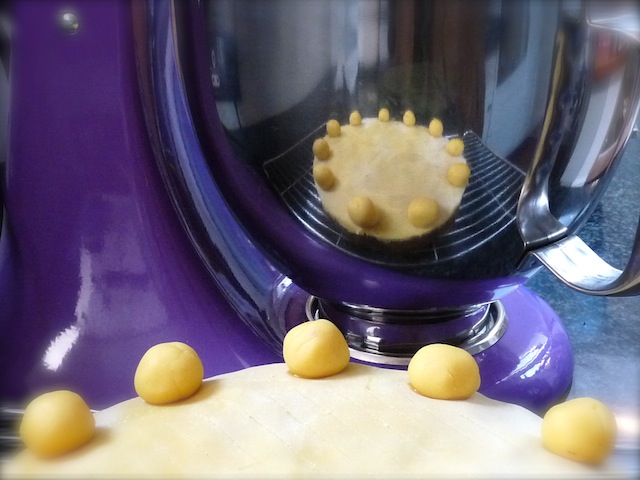
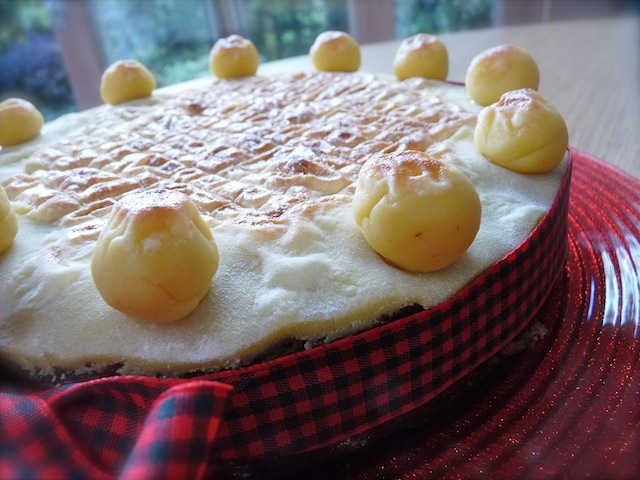
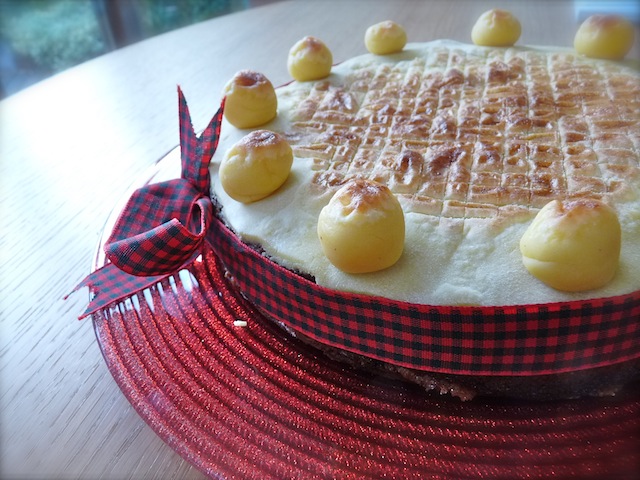
After the cake was baked and cooled, it was time to decorate it with more marzipan, and of course, the marzipan 'disciples' (minus Judas, because the culinary - and of course, religious - world is none too pleased with him). I like this part: rolling golden orbs of marzipan between one's hands, forming not-quite-perfect little spheres of sugar, is one of those therapeutic kitchen tasks that I love (along with making risotto, or rubbing butter into flour). I used an apricot glaze to stick the marzipan to the cake, and the disciples on top.

The next step is to score the surface of the cake with a sharp knife, and place it under the grill. This of course is optional, but I think the burnished surface of the marzipan (and, of course, the smell of toasting almonds and sugar) is wonderful. Two years ago I burnt it, so last year I used my cook's blowtorch, but as I hadn't brought the blowtorch home this year I had to use the grill again. I kept a very careful eye on it: it can turn from pleasant gold to carcinogenic black in a matter of seconds. I think this year I achieved just the right level of toastiness. I love the colours of the golden and brown top.
A very successful first outing for the KitchenAid, I think. Obviously I can't report on the simnel cake yet, because it has not matured. It will mature, I am determined, so I will have to let you know about it at a later date. I can't wait to try out the KitchenAid for other recipes, so watch this space. In the meantime, I will admit to standing in the kitchen and stroking the mixer lovingly, emitting sighs of culinary covetousness.
Simnel cake (makes a 20-22cm cake):
100g glacé cherries
¼ teaspoon ground ginger
500g mixed dried fruit
25g ground almonds
175g soft, unsalted butter (at room temperature)
3 eggs
175g caster sugar
2 tablespoons milk
Zest of 1 lemon
1kg yellow marzipan to decorate
225g plain flour icing sugar for rolling
1 teaspoon baking powder
1 tablespoon apricot jam, melted
½ teaspoon ground cinnamon
Take everything you need out of the fridge. Preheat the oven to 170C. Butter and line the bottom and sides of a 20cm or 22cm springform cake tin with baking paper. Chop the cherries very finely and add them to the rest of the fruit.
Cream the butter and sugar until very soft and light, and add the lemon zest. Measure the flour, baking powder, cinnamon, ginger and ground almonds into a bowl and stir to combine.
Add one of the eggs to the creamed butter and sugar with 2 tablespoons of the dry flour-and-spice ingredients, then beat in the remaining eggs in the same way. Beat in the rest of the dry ingredients, and then the milk. Finally fold in the fruit.
Dust a surface with a little icing sugar and then roll out about 400g of the marzipan. Cut it into a 23cm circle that will fit in the middle of the cake later. Spoon half of the fruit-cake mixture into the cake tin, smoothing it down with a rubber spatula, and then lay the marzipan circle on top of it. Spoon the rest of the mixture into the tin on top of the marzipan circle and smooth the top again. Bake for half an hour and then turn the oven down to 150C for another 1½ hours or until the cake has risen and is firm on top. Let it cool completely on a rack before you spring it open.
Unspring the cooled fruit cake, and unwrap the lining from the cake. Roll out another 400g circle of marzipan, paint the top of the cake with the melted apricot jam, and then stick it on.
Make 11 balls out of the remaining marzipan, roughly 2.5cm in size. Stick them around the cake using the apricot jam. Lightly score the centre of the marzipan in a criss-cross pattern with a sharp knife.
Preheat the grill to around 220C, and put the cake underneath it. Watch it carefully - you want it to be golden, but not dark brown. Remove, allow to cool, then leave to mature (if you can) for a few days or weeks before eating.