1. Health food paradise at the new Holland & Barrett More store in York. I was recently invited to the opening of Holland & Barrett’s palatial new store in the centre of York. I’ve long been a fan of the brand for their organic dried fruit, nuts and muesli mixes, and for their supply of esoteric health ingredients from around the world (they were probably stocking quinoa and tahini way before Ottolenghi emerged on the scene). The new store is a bright, vibrant space filled with all sorts of healthy treats, from nut butters to smoked tofu to their huge range of ‘free-from’ products. However, the expansion means there’s also space for a selection of beauty and makeup counters brimming with natural products to make you lovely on the outside as well as the inside. I had great fun creating my own body scrub at the Beauty Kitchen stall, using a delicious-smelling array of natural ingredients (my personal combination involved bitter orange, Epsom salts, and a zingy lemongrass oil), and enjoying a 60-second manicure with the same nourishing combination, leaving my hands gloriously soft and fragrant.
Read moreMy ultimate hot cross buns

When I first made hot cross buns as a teenager, they ended up more like hot cross rock cakes. I think maybe I over-proved them, or left too much space between each bun on the baking tray, so they puddled out like strange, beige, fruit-speckled UFOs. They were delicious, but I found myself rather disheartened at their complete lack of resemblance to those perky, burnished, perfectly-crossed specimens you can buy in the supermarket. Every year since then – and, sad to say (or a relief?), many have elapsed between my teenage years and the present – I’ve been trying to create a hot cross bun that rivals those upmarket bought varieties.
Read moreMini Simnel cakes
“I’ll go to thee a Simnel bring, ‘Gainst thou’ go’st a Mothering, So that when she blesseth thee, Half that blessing thou’lt give to me.” ~ Robert Herrick, 1648

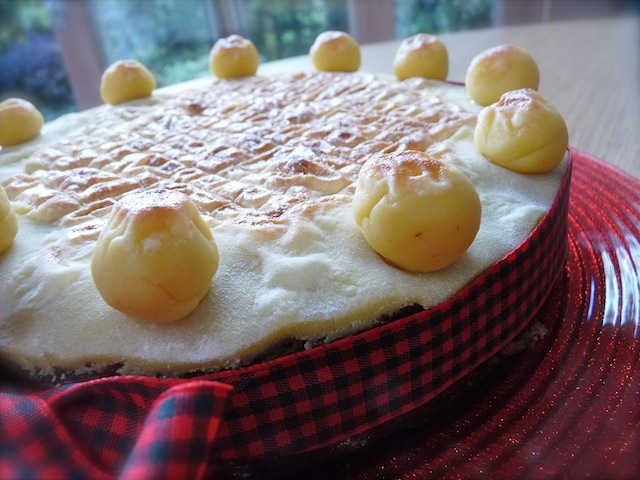
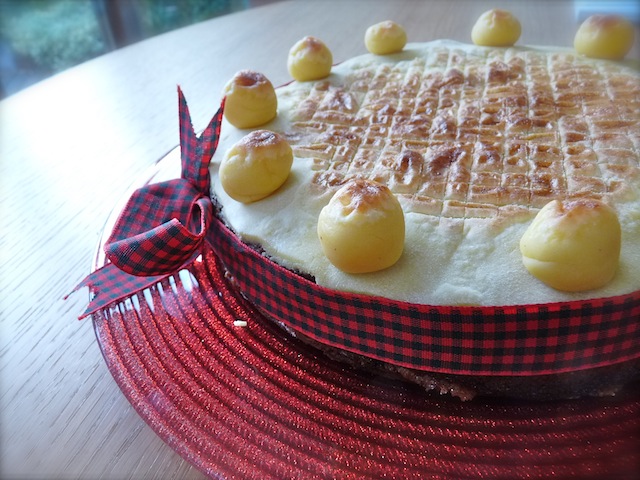
Simnel cake is one of those things bearing a gastronomic heritage shrouded in mystery and myth. Its basic make-up, however, is widely accepted: a rich spiced fruit cake, lighter than a Christmas cake, with a vein of marzipan running through the centre and another layer on top, which is toasted (if you're smart/a pyromaniac, you'll use a cook's blowtorch for this...if not, you'll use the grill, and probably end up scorching it to cinders, as I've done on several occasions). It's usually decorated with eleven marzipan balls, said to represent the disciples of Jesus - eleven because, of course, Judas didn't really earn his place on the cake. More fool him.
Simnel cakes have been around since medieval times. They are associated both with Easter and with Mothering Sunday, where young servant girls would apparently make one to take home to their mothers on their day off. Whether any of this is true, no one seems to know. What is clear is that this has now become as traditional Easter fare as the humble hot cross bun, and
I would hate to let a year pass without baking a Simnel cake.

I think perhaps it's the pleasing resemblance it bears to a Christmas cake, in form at least, but simultaneously the subtle differences involved. For one, I'm likely to be making and eating this cake in the pleasant balmy spring weather, when it's not getting dark at three o'clock and I'm not so inflicted with SAD that I feel like impaling myself on the Christmas tree decorations. It's more cheery in appearance than the dark, dense Christmas cake; that lively covering of toasty marzipan is just perfect for spring, reminiscent of daffodils, sunshine and Easter chicks. It's lighter in flavour, perfect for enjoying with a cup of tea, maybe even to be tentatively enjoyed al fresco, should we be blessed with some unusually warm spring weather.
However, making a big fruit cake is a commitment. It needs love. It needs time. It needs strong arms to stir all that stiff dried fruit into an equally stiff buttery batter. It needs patience to decorate with marzipan, and nerves of steel to dare to place it under the grill and risk all that hard work literally going up in smoke.
You know what doesn't really need all that?
Mini Simnel cakes.

These are wonderful. They combine all the best bits of a Simnel cake - dried fruit, citrus, spice, marzipan - but are diminutively lovely and require very little effort. Although they lack the wow factor of their more grandiose cousin, I think these beauties possess a little charm of their own. Particularly with their cute little marzipan decoration.

I know a lot of people who claim to hate marzipan (my father included), when really what they detest is that thick, tooth-judderingly sweet layer between the Christmas cake and its icing. Cut marzipan into small cubes, fold through cake batter, and blast in the heat of the oven, and you have an entirely different product - something melting, pleasantly chewy, sweet and luxuriant. Add dried fruit, spice, and citrus zest, and you have something truly special.
I was going to have one bite of these cakes just to test they were OK and worthy of my wonderful readership. Just one bite, maybe two - I ate rather a lot over the weekend and am attempting a 'healthy-ish eating' week in preparation for my holiday to Tuscany at the end of March (quick aside: YAY OMG I CAN'T WAIT). But when they came out of the oven and I spooned a little lemon icing over the top and finished with those tiny nuggets of bronzed marzipan...and I broke one open to photograph it...that was the beginning of the end.

They are so good. Incredibly light and fluffy, more so than you'd ever believe possible for a fruit cake (I suspect this was due to me allowing my KitchenAid mixer to give the batter a thorough beating for about eight minutes, on high speed...), with a hint of nutmeg and cinnamon and a dash of orange zest, and that plump, juicy fruit, and those molten cubes of almondy goodness. The contrast between the rich, buttery, crumbly cake and the light, zesty icing is amazing (especially while everything is still slightly warm).
They are sweet and delightful. The crumb is really light yet moist at the same time, and there's a perfect fruit-to-cake ratio - not too sugary and crunchy, but not too bland and buttery either. Perfection.
So there you have it: Easter, made bite-size and easy.

Mini Simnel cakes (makes 15):
(Barely adapted from this BBC recipe)
- 50g raisins
- 50g sultanas
- 80g currants
- 70g dried mixed peel
- Zest and juice of one orange
- 175g soft butter
- 175g caster sugar
- 3 eggs
- 300g self-raising flour
- 1 1/2 tsp mixed spice
- 1/2 tsp grated nutmeg
- 5 tbsp milk
- 250g marzipan
- 150g icing sugar
- Lemon juice
Add the orange zest and juice to the fruit and leave to soak for an hour, or microwave for 2 minutes on medium power. Pre-heat the oven to 180C/170C fan oven and prepare two muffin trays with 15 paper cases.
Using an electric mixer, beat together the butter, sugar, eggs, flour, spices and milk - keep going for about 5 minutes, until it's really light and fluffy. Take 180g of the marzipan and chop it into 1cm cubes. Fold into the cake batter along with the soaked fruit. Spoon into the paper cases and bake for 25-30 minutes until golden and firm to the touch. Cool on a wire rack.
Break small pieces off the remaining marzipan and roll into little egg or ball shapes, about 1-1.5cm diameter. Mix the icing sugar with enough lemon juice to form a fairly thick icing - stir vigorously to get rid of any lumps. Spoon the icing on the middle of the cakes and top with the marzipan balls - two or three per cake, depending on how many you've made.
Hot cross buns and happy Easter
It's Easter. Therefore it seems a fitting time to post about the hot cross buns I made a few days ago. I've been quite late with them this year - normally as soon as I return home for the holidays, I get out the flour, yeast, milk, dried fruit and spices. Better late than never, though, and I will be enjoying one of these delicious creations today, split, toasted and spread with lashings of butter. I think hot cross buns incorporate many of my favourite things: a doughy texture, a sweet crust, dried fruit, liberal amounts of spice, and the potential to be toasted and buttered. Rather like a teacake, but somehow better and more interesting. I hate the insipid versions you can buy en masse at supermarkets at this time of year: no more complex than a white bread roll, but with a cross piped on top in order to guarantee it goes in your basket in the run up to Easter. A hot cross bun is not a white roll with a bit of fruit in and a cross on top; its culinary DNA is completely different. The dough is enriched with butter, milk and sometimes an egg in order to give it that rich, glorious density that marries so well with sweet, spicy adornments.
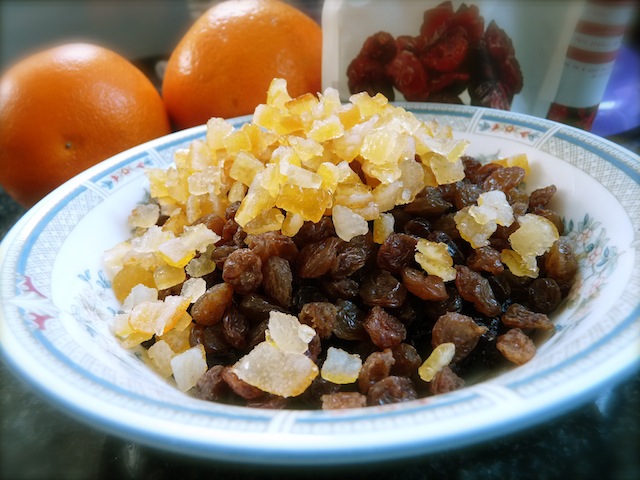
I've been reading articles on hot cross bun recipes over the last few weeks, and the general consensus is that you don't mess with the traditional dried fruit. There seems to be a particular aversion to using cranberries, for some reason. Naturally, I do love a good act of gastronomic rebellion, so I decided to make two batches of buns: one with the classic raisin, currant and mixed peel combination, and another using orange zest and cranberries. They're my hot cross buns and I will do what I like with them. Ever since I made cranberry stollen at Christmas, I can't get enough of these gorgeous, jewel-like dried berries. I also have a version including dried apple in the back of my mind for next year.

For these buns I decided to use fresh yeast, having recently discovered its miraculous qualities. It really does make a much lighter crumb and a dough that somehow feels much more alive. Some of my previous attempts at hot cross buns have been more like rock cakes, so I hoped that the inclusion of fresh yeast would give that delightful moist, spongy texture.
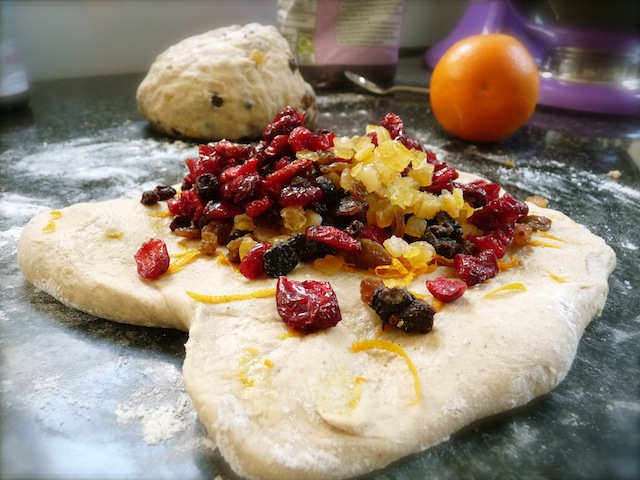
The dough was wonderful to work with: the smell of the spices and the rich texture from the butter and milk had me sitting there just inhaling the scent from the mixer bowl. Eventually I forced myself to start kneading the fruit in: the trick is to scatter it all over the stretched dough, fold it up to make a parcel, and then just keep kneading. Normally it can be quite tricky to keep all the fruit in, but because this is such a sticky dough I had no problems. I especially enjoyed grating the zest of an orange onto one batch of dough; the smell of the essential oils permeating the air as I kneaded was wonderful.
It's true, you can buy many decent versions of hot cross buns. My favourite are the M&S ones, which have a wonderfully light texture and a really rich flavour. But if there's one incentive guaranteed to make you bake your own, it's the ensuing smell in your kitchen. The aroma of spices, fruit and butter will permeate every corner of your house, meaning that the wait for the buns to cool sufficiently so they can be eaten is agonising. I'm sure there has been many a burnt tongue over the years from eager cooks losing patience and devouring a just-baked bun.
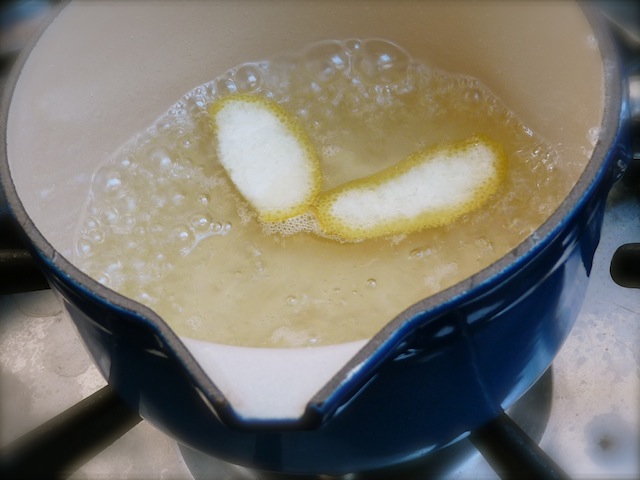
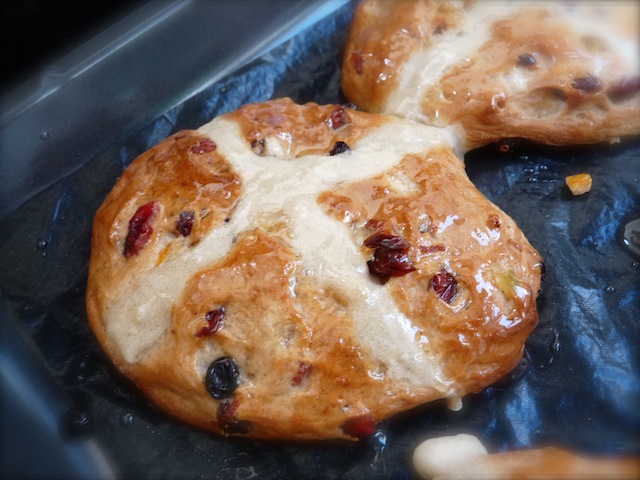
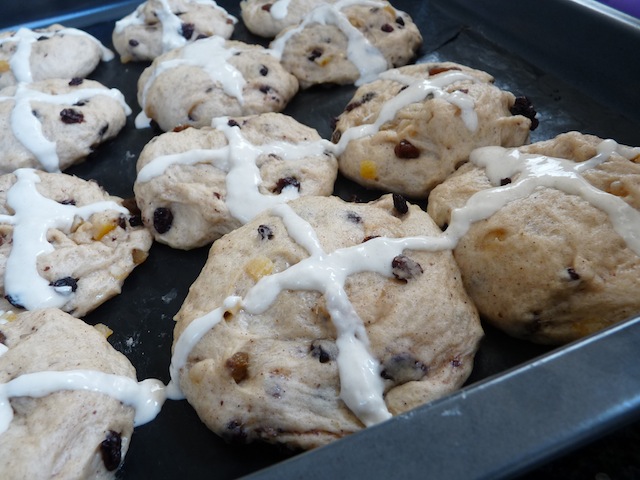
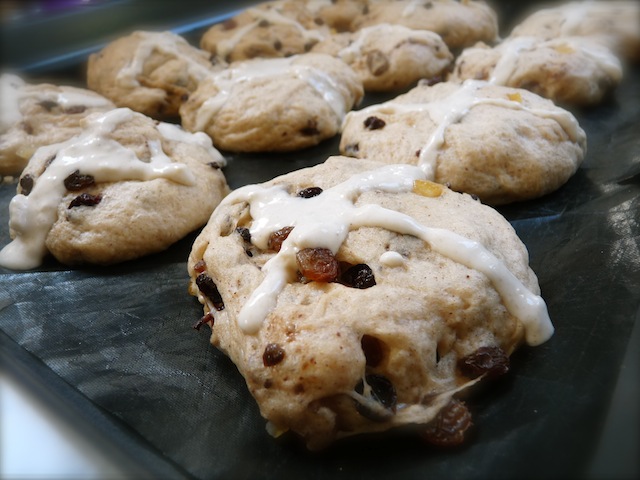
Finally, the all-important sugar glaze. This gives the buns a moist, sweet stickiness. This year I decided to jazz up the glaze a little by adding a couple of strips of lemon peel. It makes it slightly more fresh-tasting, which is a good balance for the sweet fruit and dough. I really enjoy brushing the hot syrup onto the golden buns, hot from the oven, poking it into every nook and cranny on the dough's dimpled surface. They then sit there in their own little pools of syrup until cool enough to eat, which - fortunately - only takes about five minutes.
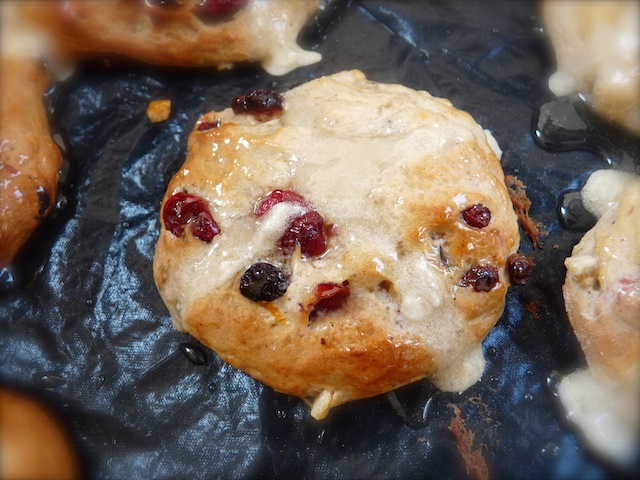
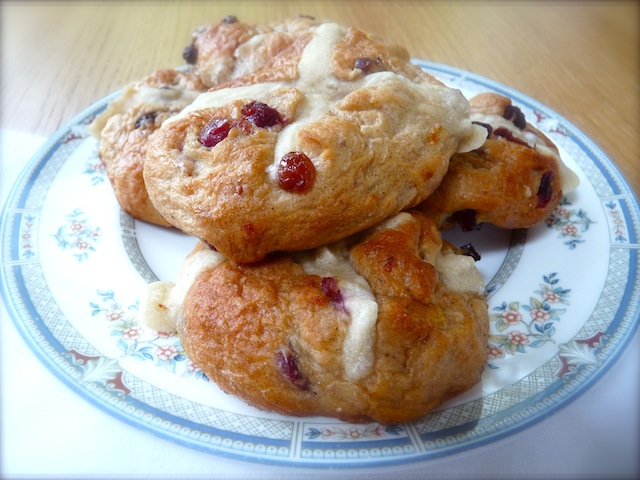
I am pleased with this recipe, although one thing I still haven't been able to master is getting the buns to rise to a sufficient height. They rose immensely with the fresh yeast, but outwards rather than upwards, resulting in quite a flat bun that isn't really big enough to split in half and toast. Not that they weren't delicious, pulled apart in a rustic, haphazard fashion and smeared with butter, but next time I might let the dough rise first and then cut it into squares before baking, instead of rolling it into little balls. This is, of course, a very minor aesthetic complaint. Otherwise, they're perfect.
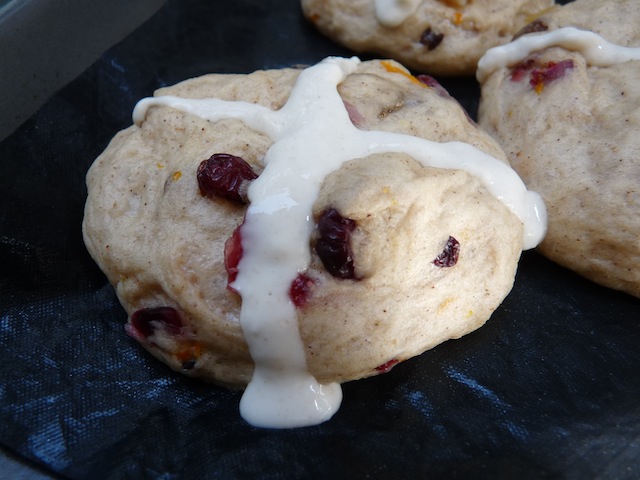
And, despite reports to the contrary, the orange and cranberry version is exceedingly good. In fact, I think I prefer it. Last year I went a bit mad and made a chocolate and orange version, which was incredible. I did feel a bit sacrilegious, introducing chocolate to the mix, but it was unfeasibly good. The chunks of chocolate melt when baked or toasted, giving a gorgeous cocoa stickiness to the bun, which, coupled with orange zest, resulted in a sort of hot cross bun slash jaffa cake taste sensation. Unorthodox, but wonderful. I suggest you try it.
Happy Easter!
Hot cross buns (makes about 20):
400g strong white bread flour
60g light brown sugar
1 tsp salt
1/2 tsp each of ground cloves, nutmeg, cinnamon and ginger
45g cold butter, cut into cubes
50g fresh yeast
130ml tepid water
70ml milk
Either 100g currants, 115g sultanas and 50g chopped mixed peel, OR for the orange and cranberry version, zest of 1 orange, 150g dried cranberries, 50g mixed peel and 50g sultanas
Flour and water, for the crosses
100g caster sugar
100ml water
2 strips lemon peel
Place the flour, sugar, salt and spice in a mixing bowl. Rub the butter in with your fingers, as you would a crumble, until the mixture resembles fine breadcrumbs.
Dissolve the yeast in the tepid water. Make a well in the centre of the flour mixture, then add the yeast mixture and the milk. Use an electric mixer with a dough hook to knead for 10 minutes, or do so by hand. It will be a very sticky dough, but avoid the temptation to add much more flour.
Spread the dough out on a work surface and scatter over the dried fruit. Pull the dough up around it to make a parcel, then continue to knead for a few minutes until the fruit is evenly distributed. Place the dough back in the mixing bowl, cover with cling film and leave to rise in a warm place until doubled in size (about an hour).
Knock the air out of the dough, then shape into small balls and place on a baking tray lined with baking paper - allow space for them to spread out. Leave again to rise until doubled in size.
Pre-heat the oven to 200C.
For the crosses, mix a little flour with a little water until you have a thick paste. Spoon into a plastic freezer bag, cut the corner off, and use this to pipe crosses over the top of the buns. Place in the oven and bake for 10-12 minutes, or until golden brown.
While the buns are baking, heat the water and sugar together until boiling, then add the lemon peel. Bubble for 10 minutes until thick and syrupy. When the buns are cooked, remove from the oven and immediately brush over the sugar glaze. Remove to a cooling rack.
Wait, if you can, for the buns to cool, then spread with butter and eat.
(Adapted from Lesley Wild, A Year of Family Recipes)
Adventures with a KitchenAid mixer #1: simnel cake
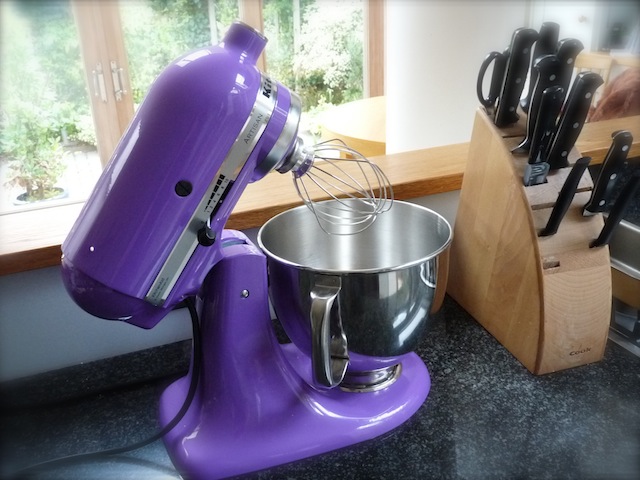
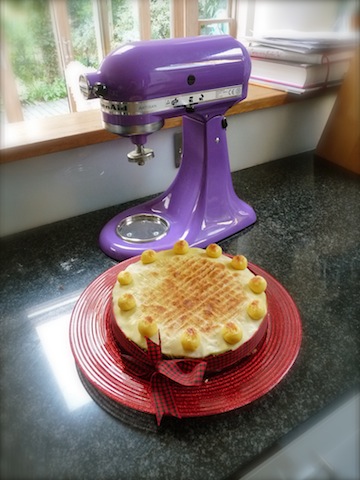
If you haven't seen one of these before, where have you been living? The iconic design of the KitchenAid stand mixer means it is coveted by cooks everywhere. And probably also non-cooking hedonists whose lives are dominated by a search for the aesthetically pleasing. You can't deny that its gorgeous curves, sleek surface and beautiful colours are probably more of an incentive to purchase it than any skill it might have in actual mixing; however, style and substance unite in its ability to effect a huge variety of kitchen tasks while still looking fabulous - it's the Nigella Lawson of kitchen equipment. I'm lucky enough to possess one of these mixers at the moment, so I'll be putting it through its paces to see how it fares in my busy culinary lifestyle.
KitchenAid pride themselves on their stylish, durable and reliable mixer. It comes with three basic attachments: a wire whisk, a dough hook, and a beater. The former is for whipping fragile mixtures like egg whites; the dough hook for - obviously - bread doughs, and the beater for thicker, more sturdy mixtures like cake batters. However, should you wish to branch out, you can get all sorts of fancy attachments for it - a pasta maker, a sausage stuffer, a mincer, a citrus juicer, and an ice cream maker, to name but a few. It's pretty amazing what you can do with one piece of equipment. Especially when it's purple. My one is the 'grape' colour, but if you take a look at the website there are over 20 beautiful colours to choose from (my favourites are 'electric blue' and 'candy apple').

Now, it's all very well me saying this, but I can't really sing the praises of the mixer until I've tested it. Fortuitously, it's that time of year when I need to start thinking about making simnel cake, an Easter favourite in our house, replete with dried fruit, marzipan, and citrus flavours. I've made it for the last couple of years and decided to make it in good time this year to allow it to mature before Easter. I'm not very good at allowing baked goods to mature - I tend to eat them before they have half a chance - so it's probably a good thing I'm going to Italy on Saturday for a week; the poor simnel cake will be able to slumber, unmolested, in my kitchen, its sticky, sugary ingredients becoming acquainted and fusing together into a fruit-studded mass of Eastery goodness. Seeing as I declared the KitchenAid to be the Nigella Lawson of kitchen equipment, I decided to use a Nigella recipe to test it.
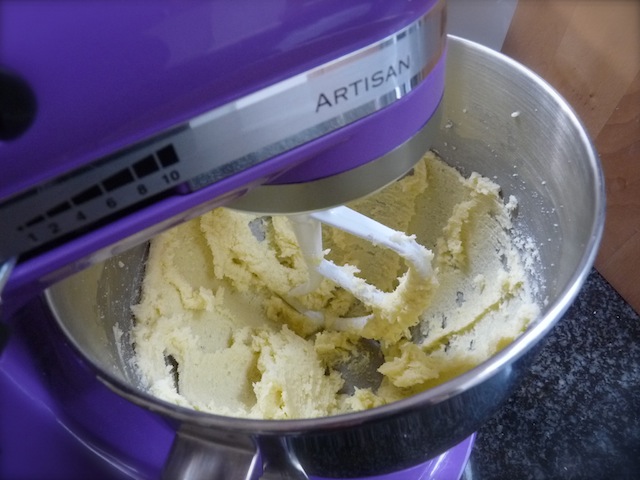
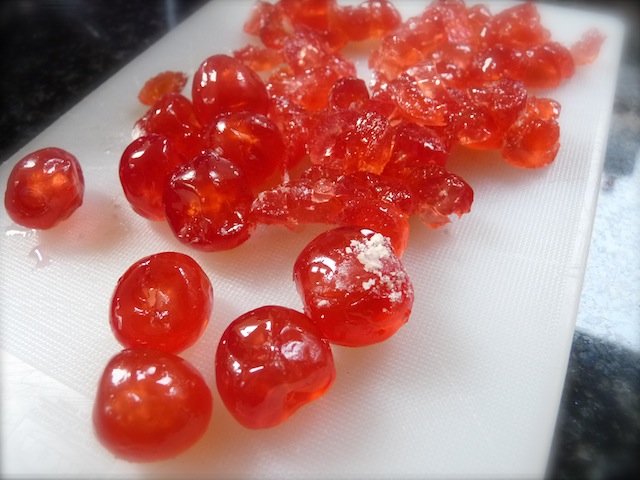
I used the beater attachment for this cake, because it's quite a thick mixture, especially once the fruit is added. Butter and sugar went into the mixing bowl, and within about a minute the mixer had beaten them to within an inch of their lives, forming a fluffy, creamy mass. I then incorporated the eggs, alternating with the dry ingredients (flour, baking powder, ground almonds, cinnamon, ginger). Finally, the fruit: glace cherries, sultanas, raisins, currants, mixed peel. One thing I would suggest is not to try cracking the eggs directly into the bowl while the mixer is on: you're guaranteed to drop half the shell in there too, which will be blitzed to a jagged paste before you can even utter a single word of profanity.
Ovoid disasters aside, I was very pleased with the mixer's performance. It's incredibly heavy, which also means it sits sturdily on the worktop and doesn't make huge amounts of noise as it mixes - far less noise than my electric whisk, which I'd normally use. One very minor criticism is that the lever you pull to change the speeds is rather stiff, and you can accidentally end up turning it off or right up when you only wanted to turn it down or up by a speed. But other than that, I have no complaints. I was worried that the beater might not be able to reach to the bottom of the mixing bowl (which, by the way, looks quite small but actually has a capacity large enough for most baking projects, at nearly five litres), leaving a residue of unmixed ingredients, but its unique planetary action (which sounds rather more exciting than it actually is, and had me eagerly expecting the mixer to launch into outer space and start orbiting Saturn) means that no part of the bowl is left unscraped.
The attachments are also very easy to attach and remove, as is the bowl, which makes for easy cleaning. It's definitely a piece of equipment that you'd want to sit on your worktop, rather than in a cupboard, largely because it's so heavy that you'd be built like a wrestler if you were trying to manoeuvre it every day. I think that's why they make so many lovely colours: you're guaranteed to find one that works with your kitchen decor.
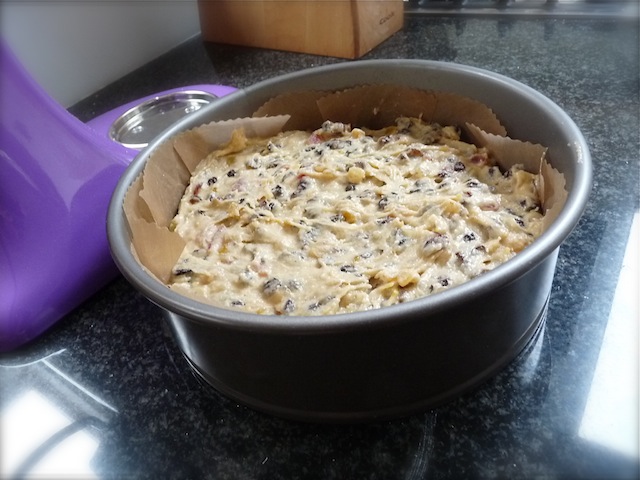
I put half the cake mixture in its tin, and rolled out a circle of marzipan to cover it, before spreading the rest of the mixture on top. It then went in the oven. This delightful vein of almond paste in the centre of the cake adds moisture and flavour without being overpowering; it's not like the huge chunk of marzipan you find in stollen. I'm not sure who had the idea of putting sugary almond mixture in the middle of a cake, but it's a good one.
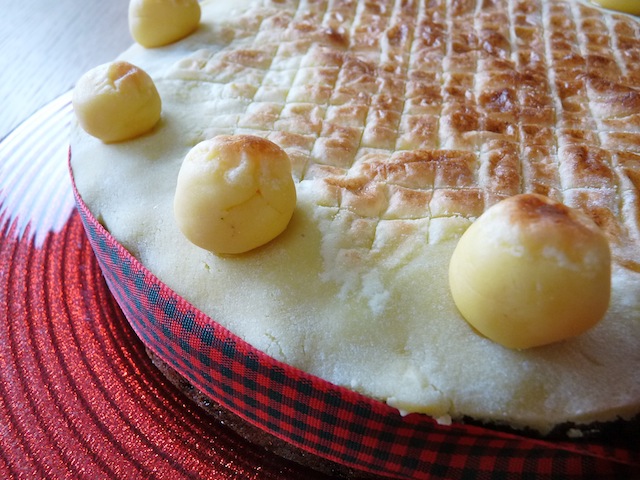
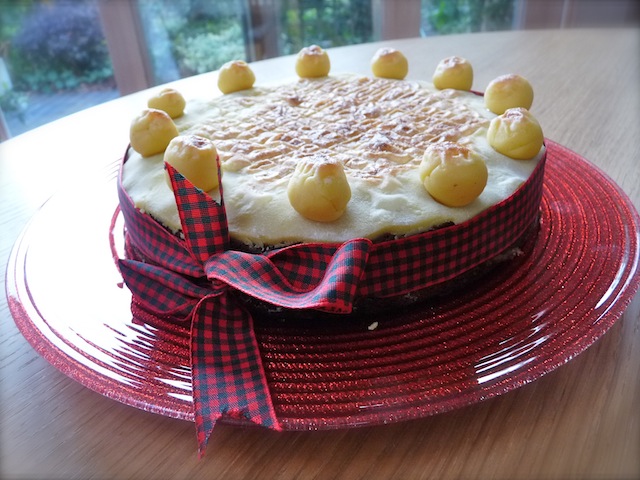
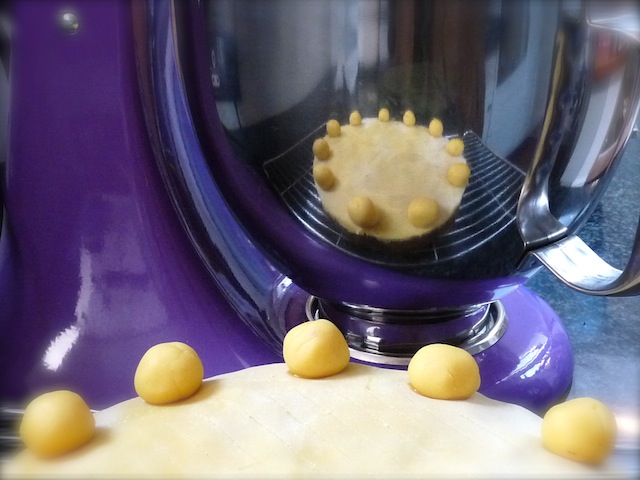
After the cake was baked and cooled, it was time to decorate it with more marzipan, and of course, the marzipan 'disciples' (minus Judas, because the culinary - and of course, religious - world is none too pleased with him). I like this part: rolling golden orbs of marzipan between one's hands, forming not-quite-perfect little spheres of sugar, is one of those therapeutic kitchen tasks that I love (along with making risotto, or rubbing butter into flour). I used an apricot glaze to stick the marzipan to the cake, and the disciples on top.

The next step is to score the surface of the cake with a sharp knife, and place it under the grill. This of course is optional, but I think the burnished surface of the marzipan (and, of course, the smell of toasting almonds and sugar) is wonderful. Two years ago I burnt it, so last year I used my cook's blowtorch, but as I hadn't brought the blowtorch home this year I had to use the grill again. I kept a very careful eye on it: it can turn from pleasant gold to carcinogenic black in a matter of seconds. I think this year I achieved just the right level of toastiness. I love the colours of the golden and brown top.
A very successful first outing for the KitchenAid, I think. Obviously I can't report on the simnel cake yet, because it has not matured. It will mature, I am determined, so I will have to let you know about it at a later date. I can't wait to try out the KitchenAid for other recipes, so watch this space. In the meantime, I will admit to standing in the kitchen and stroking the mixer lovingly, emitting sighs of culinary covetousness.
Simnel cake (makes a 20-22cm cake):
100g glacé cherries
¼ teaspoon ground ginger
500g mixed dried fruit
25g ground almonds
175g soft, unsalted butter (at room temperature)
3 eggs
175g caster sugar
2 tablespoons milk
Zest of 1 lemon
1kg yellow marzipan to decorate
225g plain flour icing sugar for rolling
1 teaspoon baking powder
1 tablespoon apricot jam, melted
½ teaspoon ground cinnamon
Take everything you need out of the fridge. Preheat the oven to 170C. Butter and line the bottom and sides of a 20cm or 22cm springform cake tin with baking paper. Chop the cherries very finely and add them to the rest of the fruit.
Cream the butter and sugar until very soft and light, and add the lemon zest. Measure the flour, baking powder, cinnamon, ginger and ground almonds into a bowl and stir to combine.
Add one of the eggs to the creamed butter and sugar with 2 tablespoons of the dry flour-and-spice ingredients, then beat in the remaining eggs in the same way. Beat in the rest of the dry ingredients, and then the milk. Finally fold in the fruit.
Dust a surface with a little icing sugar and then roll out about 400g of the marzipan. Cut it into a 23cm circle that will fit in the middle of the cake later. Spoon half of the fruit-cake mixture into the cake tin, smoothing it down with a rubber spatula, and then lay the marzipan circle on top of it. Spoon the rest of the mixture into the tin on top of the marzipan circle and smooth the top again. Bake for half an hour and then turn the oven down to 150C for another 1½ hours or until the cake has risen and is firm on top. Let it cool completely on a rack before you spring it open.
Unspring the cooled fruit cake, and unwrap the lining from the cake. Roll out another 400g circle of marzipan, paint the top of the cake with the melted apricot jam, and then stick it on.
Make 11 balls out of the remaining marzipan, roughly 2.5cm in size. Stick them around the cake using the apricot jam. Lightly score the centre of the marzipan in a criss-cross pattern with a sharp knife.
Preheat the grill to around 220C, and put the cake underneath it. Watch it carefully - you want it to be golden, but not dark brown. Remove, allow to cool, then leave to mature (if you can) for a few days or weeks before eating.